Tormach TTS Tool Rack

The vendor I purchased the used Tormach PCNC 1100 from was also kind enough to include a cardboard box of various tooling that came with the cnc mill.
The first order of business was to get some organization in order! I downloaded a 3d model from the printables website. The print on my Prusa 3d printer took approximately 9 hours. I hit print before going to bed and there was a beautiful new Tormach TTS tool rack waiting for me on the desk at breakfast.


An inventory of the tools shows half are drill bits and the other half are an assortment of 1/16” to 3/8” end mills. There is also what appears to be a shear hog, 2 roughing mills, an o-ring cutter and a diamond engraving bit. I need to find a fun excuse to play with this o-ring groove cutter! Im also very excited to use the diamond engraving bit in some future projects.
What I don’t have is a shell mill or a face mill and will need to be ordering one of those posthaste!
Tormach PCNC 1100

After three years of learning basic machining skills on my Bridgeport milling machine and Grizzly lathe I decided it was time to upgrade to a Tormach CNC. I had hoped I could find a used 440 or 770 model at a reasonable price, so I was ecstatic after months of casually searching when I serendipitously came across a very reasonably priced Tormach PCNC 1100 less than an hour away for sale at Machinery Values in North Jersey! Lady Luck smiled at me!
Tormach Inspection
I drove to the warehouse and inspected the Tormach PCNC 1100 there in person. The team at the warehouse allowed me to see the CNC mill operated under power. Everything on the machine was in good working order except for the bed which had been accidentally milled in a few spots on the slotted table by the previous owner. Ugly but by no means a dealbreaker for me. I was able to negotiate a small price reduction based on this fact.


Tormach PCNC 1100 CNC milling machine bed – you can see the accidental holes and grooves made by the previous owner.
Delivery Day
The Tormach PCNC mill was delivered a few weeks later by Hopatcong Rigging company.

The Tormach PCNC came shipped via flatbed truck and the mill came mounted on its stand. The rigging team unloaded the mill onto a fork truck from the base and carefully drove the mill via the fork truck up my quasi steep driveway without issue. The mill just barely fit inside the garage door. The rigging team was able to place the hobby CNC mill just inside my garage door (it just fit, but I think Tormach designed their machines this way in order to maximize capability for use in hobbyist garages). The rigging team then used a pallet jack under the machine to precisely slide it to the desired spot in my garage.

Checkout
After plugging in the controller and the CNC to power the machine booted up and came online without any issue. Jogging along the X, Y, and Z axis worked perfectly. The legacy keyboard is a bit sticky for some of the buttons and will require replacing. My old pancake compressor to power the power drawbar is just too loud and will need to be replaced with an ultra quiet compressor so I can hear myself think when I’m operating the machine.
First Test Run
I followed the manual to mill a pocket in a piece of wood. To my relief everything worked perfectly!


Overall my newly acquired CNC mill has some aesthetic blemishes on the table and the paint could use a touch up, but other than that I think this machine is an excellent launching pad for my CNC journey!
3D Printed Toys
3D Printing + Electronics = Awesome!
Touch screens; they just dont have that nostalgic clickety-clack feel of buttons, switches, and knobs. I’m working on a 3D printed tactile toy. The first prototype is looking promising although the white overture filament I am using to print the enclosure is giving me a hard time with bed adhesion.


I would describe the final prototype as a fidget spinner on steroids.
How Much Does This Meeting Cost?

How much does this meeting cost?
A 3D Printed Arduino Project
Arduino +Autodesk fusion + 3D Printing + Coding = awesome fun!


3D printing an arduino timer enclosure


3D Printed Model Rockets
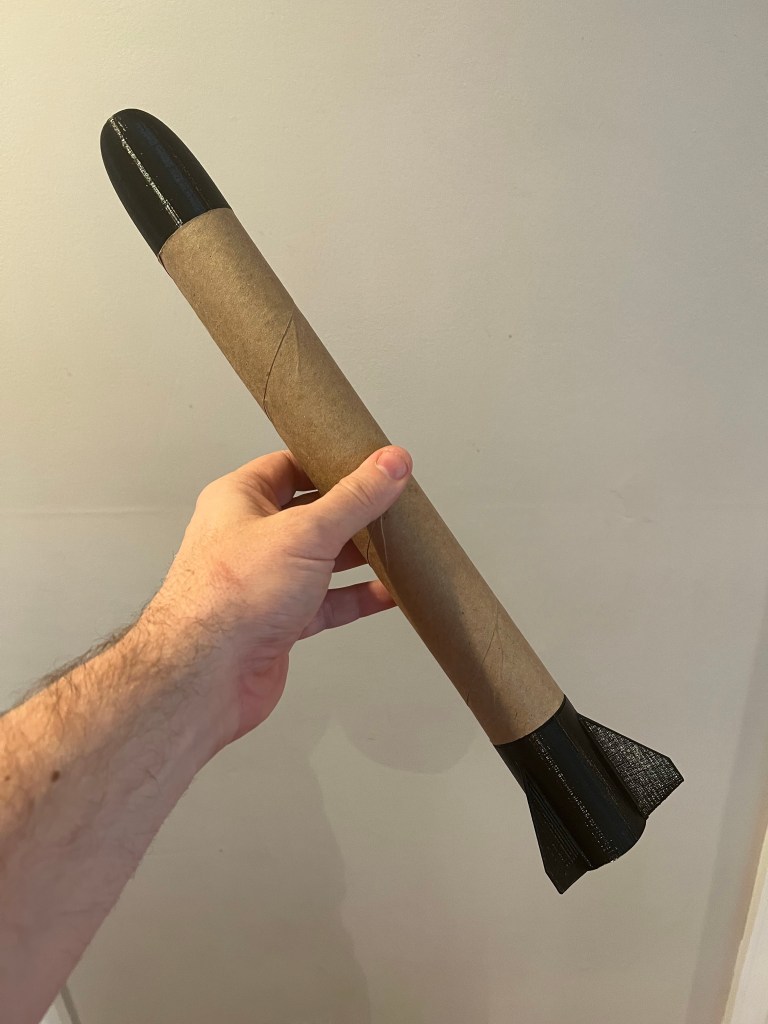
I completely redid my design for the bounty towel paper model rocket so I could print the model upside down and get much more aggressive looking tail fins for the 3D printed model rockets.


Free Download
I had a few requests for the file so I will post them here. Over time I have found some differences in diameter of the paper towel rolls and you may need to wrap electrical tape around the base to get them to fit properly.
Click below to download a compressed file containing the models in a specific format called .3mf.
DIY Model Rocket Launcher

A DIY 3D Printed Rocket Launcher
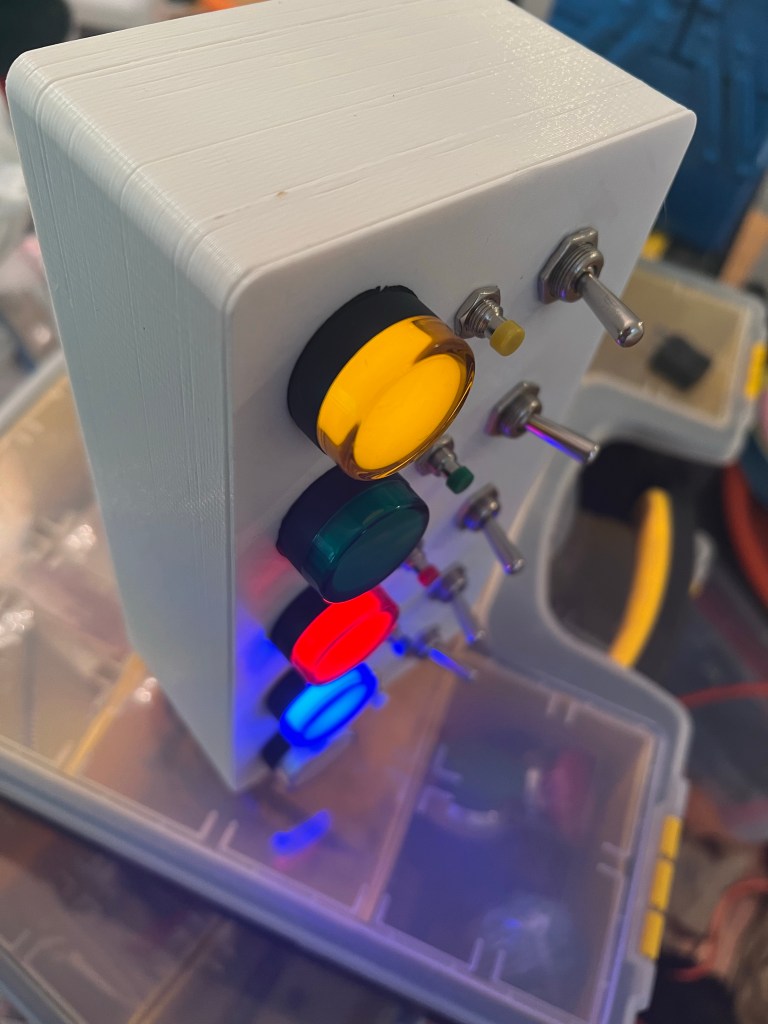
After successfully launching a multitude of my 3D printed Bounty Towel rockets, my kids and I decided we needed a more badass rocket launcher than the bland and generic store bought mass manufactured versions. My biggest complaint with the generic store bought models is when you press the switch you get very little feedback on what is happening. This is especially concerning when the rocket doesn’t immediately launch. There is also ample opportunity for improvement in the aesthetics department on these devices.
If we wanted an awesome rocket launcher we were going to have to print, build, wire, and assemble it ourselves!
Model Rocket Launcher Plans
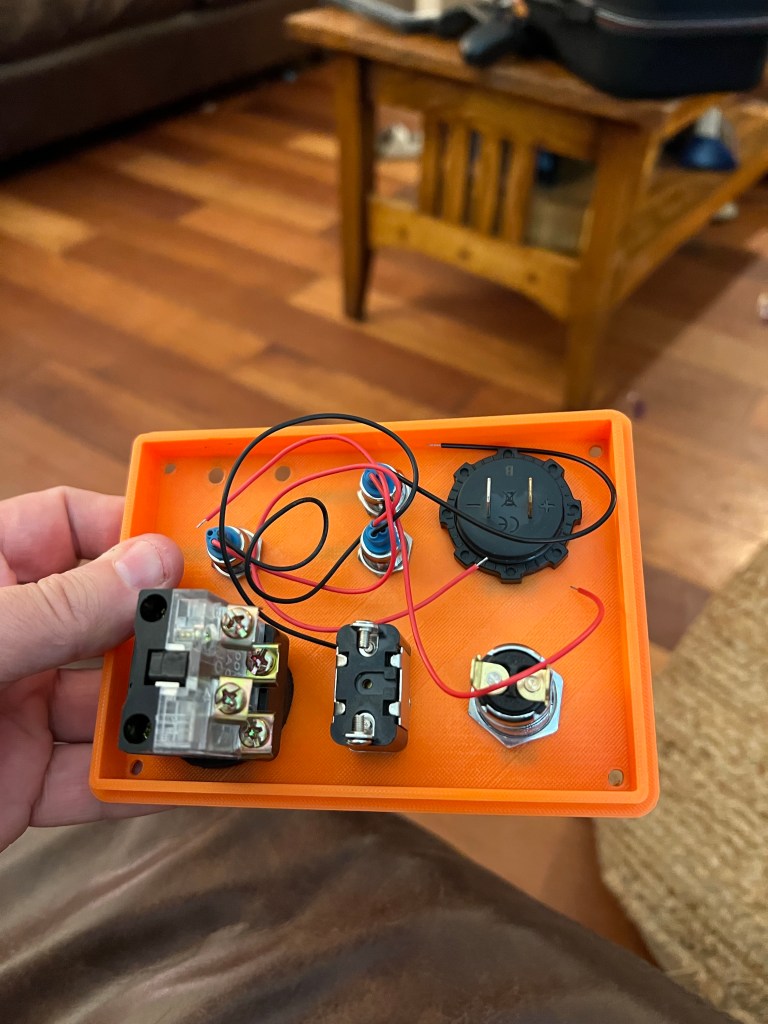
Bill of Materials (BOM)
- 3D Printed enclosure (cover + base are my design) <- Download here
- Battery Enclosure (8 AA Batteries)
- 12V Battery Voltage display
- 3 Indicator LEDs (for power, continuity and armed status)
- On/Off Key Switch
- 1 red cover toggle switch
- 1 red push button switch
- 4mm banana plug female terminals
- 3” Metal Handles (Qty 2)
- Optional Swag: Launch Key Lanyard


DIY MODEL ROCKET LAUNCHER CONTROLLER WIRING DIAGRAM


DIY Model Rocket Launcher Download Link
3D Printed Rockets
For the second iteration of the bounty towel rocket I made the fins much bigger and I made the nose cone more aerodynamic looking. In an effort to get better flight telemetry we taped two nickels to the inner nose cone in order to get the center of pressure (CP) behind the center of gravity (CG). In our case two nickels was enough for a perfectly straight flight of our 3D printed rocket into the heavens.


3D Printed Model Rockets
3D Printed Model Rocket Prototype 2
For the second iteration of the 3D printed Bounty paper towel rockets I’m now pushing the envelope when it comes to minimum wall thickness of the printed assembly to save weight and material as well as optimizing the print time. I cut down the size of the tapered piece for the nose cone and base that slide into the power towel roll ends. The diameter for the model engine is better but still too much of a tight interference fit for my liking. That will also require some more “dialing in”.


Next Iteration
The 3D printed rockets are not satisfactorily stable and have a tendency to flip ass over teacup in midair. After further research I have been most recently enlightened that we need to modify the design parameters such that the center of pressure (CP) is behind the center of gravity (CG) for suitable stability. A destabilizing force is created when the CP is above the CG. the next design is going to have much bigger fins and the nose cone will have internal threads to accept a 1/4 UNC bolt (and nuts if needed) to push the model rocket’s CG forward to obtain better stability.
3D Printed “Bounty Towel” Rockets
I always enjoyed building model rockets with my dad and sister as a kid but always found the construction process of cutting, sanding, aligning, and gluing the balsa wood fins to be tedious and take a lot of fun out of the process. Back then the hot glue gun fixed a number of model rocket fabrication shortcomings for me.
Paper Towel Roll Concept
For a good while now every time I see an empty paper towel roll I see a model rocket body. I’ve been mulling a concept in my head for some time now to design and 3D print a model rocket nose cone and model rocket fins that could attach seamlessly to a paper towel roll to serve as the model rocket body. We had some empty bounty paper towels in the house so this weekend we fired up the CAD and the 3D printer and gave it a shot. The final results came out better than I could have expected!


Verdict
It works! Our only problem was that we only had wimpy “A” rated model rocket engines on hand. Due to the weight of the assembly combined with the underpowered rocket engine the first two 3D. Printer paper towel roll prototypes went less than 100 feet into the air. Other than that everything worked splendidly.
Next Iteration
My goal for the next iteration is to take the design down to the minimum 3d printer wall thickness (the internet is telling me the minimum is about 1.5 to 0.8 mm for the absolute minimum) and see how well the structural integrity of the design holds up. That combined with some “C” rated model engines should add some serious kick to our rocket power of these 3D printed “bounty towel” rockets. This isn’t rocket science (or is it?)