One of my main reasons to acquire a Bridgeport milling machine and Grizzly lathe was to scratch this itch of mine to build model steam engines. It’s hard to explain, but I hear a calling to build these things. I got the idea to look for a model engine show for some inspiration and mentoring last February 2019, so I was very dismayed to learn that I had just missed one of the largest model engineering shows in my backyard by a few weeks: the Cabin Fever Expo held in Lebanon, PA. I marked Cabin Fever Expo 2020 on my calendar and waited with patience! After declaring my intent to attend this event, I was grateful to have my son state he was willing to tag along. After a somewhat grueling two hour drive on a blustery day into Pennsylvania in moderate sleet and snow we arrived!
The Cabin Fever Expo appears to be segregated into 4 areas, there are tool and part vendors, an ongoing auction with mostly model train parts for sale, a main hall with the model engines, a hall with consignment items for sale, and another hall with model boats, cars, tanks, etc.
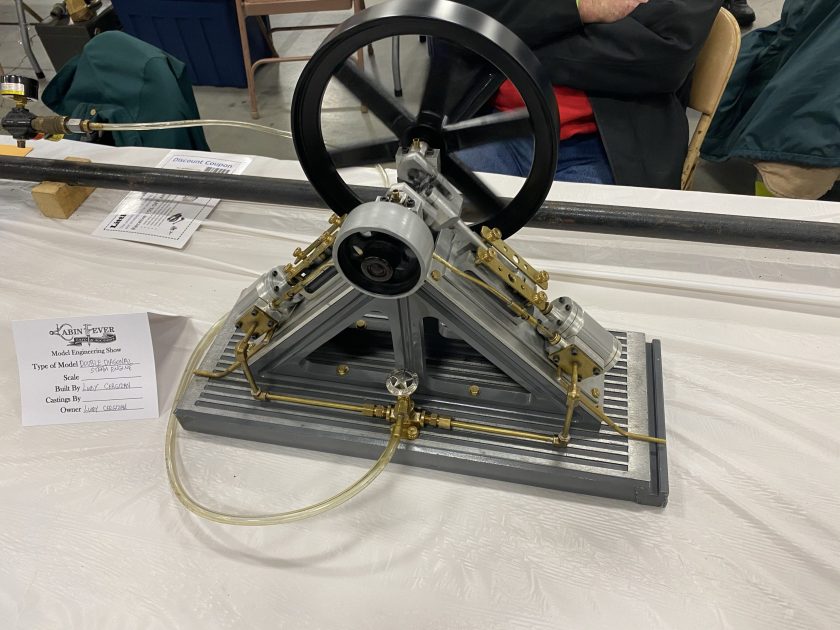
We spent the majority of time in the main hall with the model engines. The craftsmanship is humbling. What used to be a practical trade has become a lost art of craftsmanship and manual precision engineering.
Obviously, we couldn’t leave empty handed! We purchased some lathe tool bit inserts, a coaxial indicator for the mill, a drill bit guide, and a beginner model engine castings kit.
Santa got us a Prusa i3 MK3S 3D printer for Christmas . I’ve seen the Prusa crew and their printers in action several times at the NYC Maker Faire and at other smaller MakerFaire over the past three years. Make magazine has printed several articles in their “best gear” editions and the Prusa printers are almost unanimously identified as the best bang for the buck.
The unboxing of the Prusa i3 MK3S
The Prusa model comes in two options. There is a preassembled option for $999 and a build it yourself option for $750. I opted to go for the DIY built it yourself model. I’ve believed the only way to have a fully fundamental understanding of how the device works is to build it from the ground up. I also figured if the printer needed any future maintenance, repair, or installation of upgrades I would need this knowledge of how everything comes together.
Fasteners, fasteners, and more fastenersIt comes with all the tools you need to assemblePartially assembled with a pause to eat the fabled Harbo gummy bears
The Build
I assumed the build would take a few hours (initially I just assumed less than 3). I was so naive! I read online that an average build time to put the 3d printer together can easily take 10 hours. I think mine took close to 16 hours. I really took my time with setting the tension of the belts and the final electrical wiring. If you are going to build your own printer from the Prusa kit I would recommend setting aside a large chunk of time (about 4 hours) over three days.
The kit comes with the infamous bag of gummy bears which seem novel at first, but rewarding yourself with the very specifically prescribed number when you finish the macro level sections of the build is surprisingly very rewarding and fun.
If you take your time, don’t rush, and read the instructions carefully, then almost anyone should be able to do this build. The final wiring up of all the servos, sensors, and power cables is relatively easy, it just requires a very slow and methodical attention to detail. I can’t tell you how relieved I was when the LCD powered on and fully successfully performed all of the calibration checks!
I did the majority of the build on the dining room table with my son and daughter watching closely beside tme. The build is an excellent way for young minds to see mechanical engineering principles slowly combine and manifest into a fully working device. As we built the printer we discussed concepts such as servo motors, the concept of a power supply, gears, set screws, linear bearings, hardened rods, extrusion nozzles, and sensors. I can’t understate the educational value of this build for young engineering minds.
First 3d print – A whistle!
Our first print was a whistle from the supplied SD card. It took about 20 minutes. After we got the hang of setting up the printer we printed a vase, a pug dog figure, and a gear set from files included with the SF card from Prusa. I am still amazed at the quality of the print. The detail exceeded my expectations. Simply unbelievable!
Ant weight “pusher” battle bot combat robot 3d printed by Prusa i3 MK3S
Since the main reason for getting the printer was to generate prototypes for combat robotics we pulled an ant-weight combat robotics .STL file from thingaverse to print. This print room about 6 hours. We let it run overnight, and like magic it was waiting for us there in the morning.
3d printed antweight combat robot body
Conclusions
Embrace technology! I’m excited for the moment when some small part breaks around the house and we can re-engineer a CAD file to print a replacement part on the spot. Just having the device here has me thinking about ways to use this new in-house (pun intended 😉 ) capability. The Prusa 3D printer models are the best value for your dollar and are an affordable foray into on-the-spot design and manufacturing. Building the unit from the parts level is a labor of love and an experience to be cherished.