I’m pivoting over to CAD modeling and 3d printing storage bases to store the chucks for my Grizzly G4003 lathe when not in use. the concept was something with holes to accept the dowel pins face down and side grips to easily grab and lift the lathe chuck into and out of the tool chest. Simple right?
5C Collet Chuck Base Concept modeled with Autodesk Fusion 360Slicing up the 3d model with Prusa Slicer software3D printing the 5C collet chuck base with the Prusia 3d printer 3D printed Collet Chuck Base – the finished print 5C Collet Chuck prototype – proof of concept
The first concept came out better than I had hoped but I see a few areas for improvement. The next interaction I am going to increase the diameter of the dowel holes to make landing the chuck ridiculously easy and to make the side grips wider and longer to it’s less tippy in your hands.
I recently upgraded my precision measuring instrument (PMI) toolbox with a lovely Mitutoyo vernier caliper and a Mitutoyo micrometer. They are sweet! Buttery smooth precision.
My new Mitutoyo MicrometerMy Mitutoyo Vernier Caliper
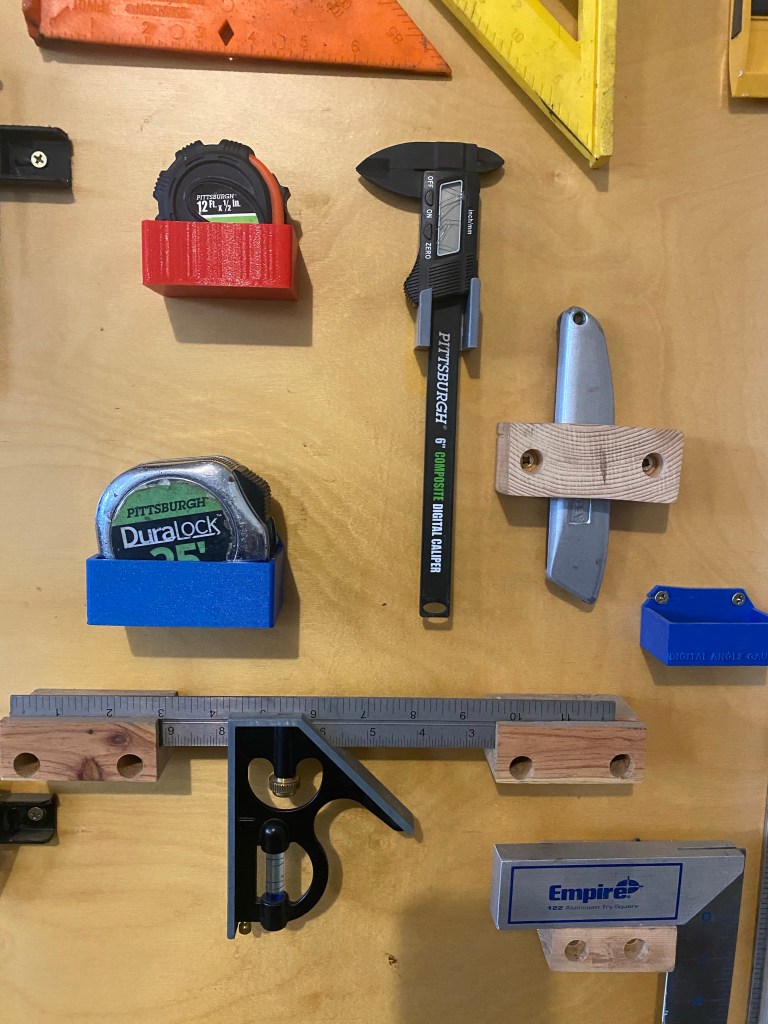
That being said, I still have an economy Pittsburg Tools vernier caliper acquired from Harbor Freight that has served me well in years past. Especially when you consider it retails for under $20.
I still like to keep the Pittsburg caliper on my tool wall for quick and dirty measurements that don’t require three decimal place precision. I decided to model up a bracket for 3d printing to mount it on the tool wall.
Pittsburg Vernier Caliper tool wall mounting bracket 3d model
It took me three iterations to get the model right. The first prototype my mouthing angle for the angled base was off by a few degrees and the upper mounting arms were to thin and aesthetically too flimsy in my opinion.
The second iteration I was able to both add and remove material in various locations to optimize the print time down to 40 minutes.
The pandemic has allowed me the luxury of more time to pour over some of my machinist books. While reading Machine Shop Know How – The Tips and techniques of master machinists, I came across a very enticing project to make a dedicated center drill holder for my lathe tail stock.
Machine Shop Know – How by Frank Marlow
I started with a 3MT To 2JT Tanged End Drill Chuck Arbor purchased from Amazon for about $12.
Prepping the MT Jig
The center drill I selected to be used in the dedicated Morse taper fixture measured in at 0.248. I put the jig in the tail stock and used my relatively new collet chuck to center drill the jig with the collet holding the tool piece. Next the jig was drilled on the JT end just undersized and then finally finished out with a reamer. Again both operations were performed with the collet holding the tool pieces. I had to purchase a custom reamer for this and made the error of buying an exact fix reamer (0.248) which made the fit too tight for the first fit up. (Facepalm). I then ordered a reamer .001 larger (0.249) which after being reamed fit perfectly into the Jacobs taper end of the fixture.
3 Morse Taper to 2 Jacobs Taper Drill Chuck Arbor Drilling the MT to JT fixture to accept the center drillFinal reaming of the MT to JT fixture to accept the center drill
Adding a set screw
The text states to grind a flat on the center drill bit that will be used to accept the flat of a future set screw. This is best done on the surface grinder since the bit is hardened.
After the center drill holder was properly reamed to accept the center drill tool bit I drilled and tapped the Jacobs taper to accept a #10-24 set screw.
Drilling the MT to JT fixture to tap and add a set screwThe MT to JT fixture successfully tapped to hold a #10-24 set scew to secure the center drill in place.A dedicated MT center drill holder
The finished product came out well! I slapped the dedicated MT center drill into the tail stock and put a center indentation in a piece of scrap stock. The center bit did move a little more inwards before fully settling and bottoming into the reamed out hole and the set screw subsequently had to be lightly retightened. Otherwise all was well.
It works!
This is a simple tool but one that will add efficiency to the shop. This will be a pleasant addition to my lathe toolset.
Did I mention I hate pegboard? I hate it, flimsy and ugly! I’m on a mission to custom print every tool holder for my custom made tool wall that is finishing out nicely. After making a socket holder, I decided it was time to make some holders for my disorganized socket sets. I made one set of shallow holders for metric and one for SAE for my 3/8 drive socket wrench.
I’m trying to decide if I like having the letters in an engraved or embossed format.
Next up I’m going to design and print one for my deep socket set. after that is done I’ll make a set for my 1/4 and 1/2 socket sets.
Now that I have had my Prusa I3 MK3S 3d printer for 4 months I have had an educational time upgrading the unit with aftermarket add-ons promoted by the 3d printing community. Obviously, one of the neatest aspects of the unit is that it can print it’s own upgrades!
Modified Duct Fan
Prusa Delta P Duct Fan Upgrade
The stock shroud that comes with the base kit was flimsy and chunks were occasionally meting off and falling in my prints. I stumbled upon the Delta P duct fan upgrade in a Reddit post. You can download the info and plans here. At the start I printed it and installed this fan configuration because I thought it simply looked really cool, but I’ve come to the opinion that this configuration is superior to the base configuration that comes with the printer. I do believe the fan runs quieter, is more structurally stable, and that it does a more precise job of ducting the air to the nozzle base.
Silicone Sock
Aftermarket 3d Printer Hot End Silicone Sock
I read about these after fixing a clog in my E3D V6 hot end a few weeks ago. The aftermarket hot end Silicone Sock runs about $8 and is well worth a try. The silicone sock keeps your hot end insulated, keeps it clean, and prevents against stray filament curling around, sticking to the hot end and the associated risk of creating a filament blob. There is a small risk the silicone sock could come lose and fall into your print during operations, but to date mine is fastened snugly on the hot end without issue since installation. In my opinion the silicone sock has done a great job to keep the hot end clean and in general improves the quality and reliability of the print.
Silicone Sock
Filament Extrusion Visualizer
The last upgrade I’ve made is a filament extrusion visualizer. This add-on is more aesthetically fun than anything else, but does have some minor functionality by quickly enabling you to observer how the extruded is operating at any given time.
The Prusa Extruder Visualizer tutorial has mostly windmill and screw type designs, but I chose to go with a nostalgic wind up toy configuration, but there are many fun Options to choose from. I’ve seen YouTube videos where the windup knob appears to crank in time lapse videos which also adds a pleasing visual effect. (Tinkering with 3d printing time lapse is on my to do list)
The set up is simple. You print your extruder visualizer, and then take a tiny Neodymium magnet
(8x3mm) and super glue it to the printer extrusion visualizer componen. The magnets make for interchange options.
I’ve been experimenting with printing face-masks to wear during the pandemic.
The .STL file was downloaded from Thingiverse .com and then printed on my Prusa I3 Mk3S 3D printer. I love the Prusa 3d printer. It is so choice. If you have the means, I highly recommend picking one up.
The parts for one COVID-19 mask take approximately 7 hours to 3D print.This 3D print of 3D COVID-19 masks took 18 hoursFinished and assembled COVID-19 mask 3D printed on my Prusa I3 Mk3S
A HEPA filter from a HVAC unit or a vacuum cleaner bag can be cut to make the masks filter unit. I don’t have flexible filament on hand so the the mask is rigid. A rubber weather strip gasket can be used to line the interior for a gasket effect.
Santa got us a Prusa i3 MK3S 3D printer for Christmas . I’ve seen the Prusa crew and their printers in action several times at the NYC Maker Faire and at other smaller MakerFaire over the past three years. Make magazine has printed several articles in their “best gear” editions and the Prusa printers are almost unanimously identified as the best bang for the buck.
The unboxing of the Prusa i3 MK3S
The Prusa model comes in two options. There is a preassembled option for $999 and a build it yourself option for $750. I opted to go for the DIY built it yourself model. I’ve believed the only way to have a fully fundamental understanding of how the device works is to build it from the ground up. I also figured if the printer needed any future maintenance, repair, or installation of upgrades I would need this knowledge of how everything comes together.
Fasteners, fasteners, and more fastenersIt comes with all the tools you need to assemblePartially assembled with a pause to eat the fabled Harbo gummy bears
The Build
I assumed the build would take a few hours (initially I just assumed less than 3). I was so naive! I read online that an average build time to put the 3d printer together can easily take 10 hours. I think mine took close to 16 hours. I really took my time with setting the tension of the belts and the final electrical wiring. If you are going to build your own printer from the Prusa kit I would recommend setting aside a large chunk of time (about 4 hours) over three days.
The kit comes with the infamous bag of gummy bears which seem novel at first, but rewarding yourself with the very specifically prescribed number when you finish the macro level sections of the build is surprisingly very rewarding and fun.
If you take your time, don’t rush, and read the instructions carefully, then almost anyone should be able to do this build. The final wiring up of all the servos, sensors, and power cables is relatively easy, it just requires a very slow and methodical attention to detail. I can’t tell you how relieved I was when the LCD powered on and fully successfully performed all of the calibration checks!
I did the majority of the build on the dining room table with my son and daughter watching closely beside tme. The build is an excellent way for young minds to see mechanical engineering principles slowly combine and manifest into a fully working device. As we built the printer we discussed concepts such as servo motors, the concept of a power supply, gears, set screws, linear bearings, hardened rods, extrusion nozzles, and sensors. I can’t understate the educational value of this build for young engineering minds.
First 3d print – A whistle!
Our first print was a whistle from the supplied SD card. It took about 20 minutes. After we got the hang of setting up the printer we printed a vase, a pug dog figure, and a gear set from files included with the SF card from Prusa. I am still amazed at the quality of the print. The detail exceeded my expectations. Simply unbelievable!
Ant weight “pusher” battle bot combat robot 3d printed by Prusa i3 MK3S
Since the main reason for getting the printer was to generate prototypes for combat robotics we pulled an ant-weight combat robotics .STL file from thingaverse to print. This print room about 6 hours. We let it run overnight, and like magic it was waiting for us there in the morning.
3d printed antweight combat robot body
Conclusions
Embrace technology! I’m excited for the moment when some small part breaks around the house and we can re-engineer a CAD file to print a replacement part on the spot. Just having the device here has me thinking about ways to use this new in-house (pun intended 😉 ) capability. The Prusa 3D printer models are the best value for your dollar and are an affordable foray into on-the-spot design and manufacturing. Building the unit from the parts level is a labor of love and an experience to be cherished.